bathroom makeover
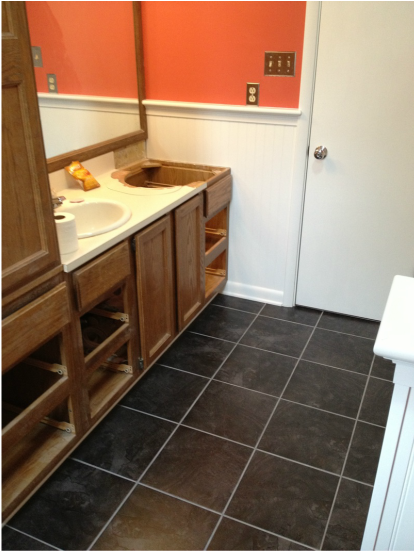
before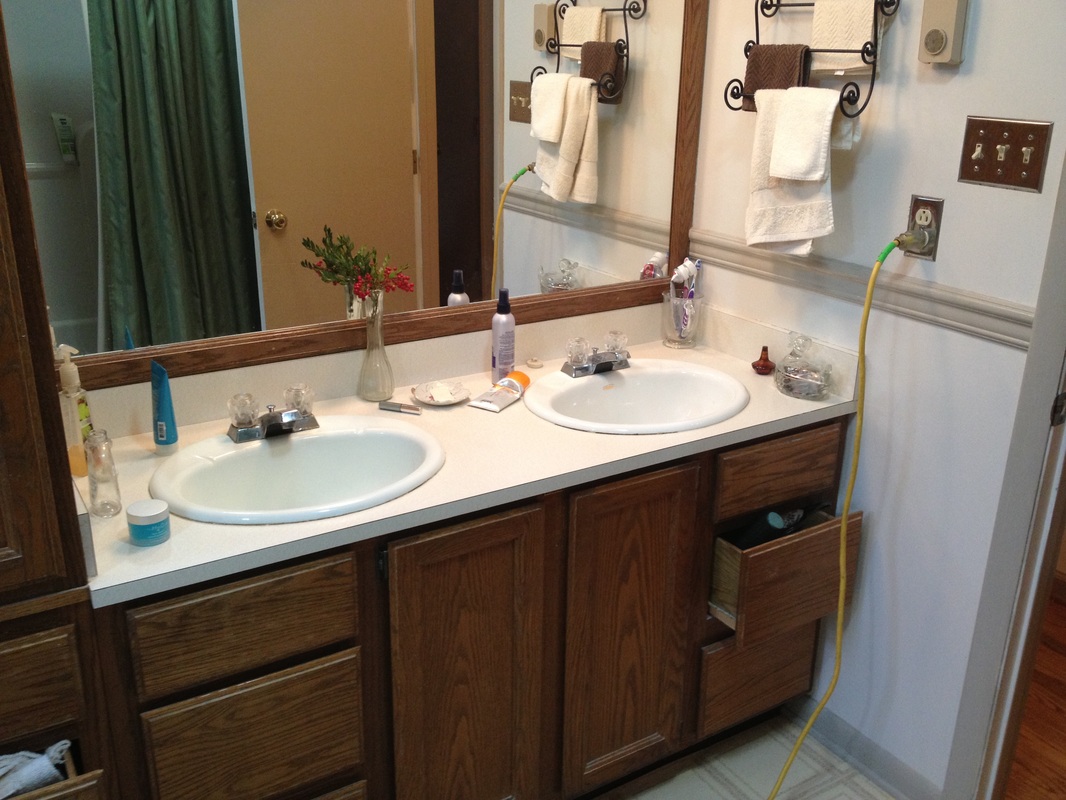
|
after
|
Click here to see more before and after pictures.
The project...
The first floor bathroom at my parent's house has undergone several renovations/upgrades since the mid 1980's. It used to be two separate bathrooms, both of which were tiny. In 1986 my granddad took out the separating wall and one toilet to make way for a larger vanity with double sinks. Two sinks were useful when my sister and I were still living there, but since my mom is now the primary user, she decided that one sink with more counter space would suit her better.
This bathroom also had a cast iron tub with subway tile shower walls. Because the shower walls had no waterproof membrane, the drywall behind the tile got wet and finally caved in around 1999. We decided to replace the tub along with the tile walls since both were an outdated green color. I then installed a new fiberglass tub and shower surround. The same thing happened at my aunt's house because the tile walls were built the same way; I installed a fiberglass tub/shower unit for her as well.
Other past upgrades included a linoleum floor with 1/4" plywood underlayment, chair rail, several different paint colors, and an air supply vent from a heat pump (added 2012). Because these upgrades were made at different times for different reasons, this bathroom lacked a sense of cohesiveness and was due for some repair work as well. Drywall at the tub was disintegrating, the linoleum meeting the tub was curling up, the shower surround caulking was falling out, the toilet water supply was leaking, and the sinks and light fixtures were rusting.
The makeover...
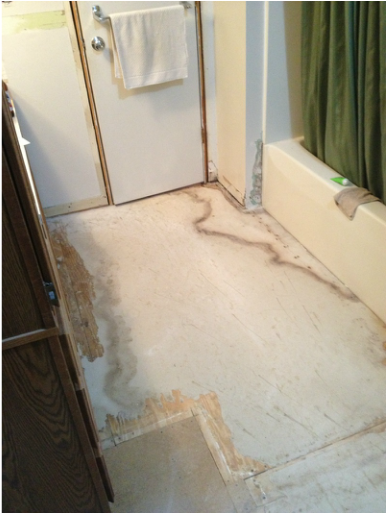
I began by removing the door casing and baseboard. After that I removed two layers of linoleum and one layer of 1/4" plywood underlayment.
The linoleum that was glued directly the subfloor left its paper backing as I pulled it up, which proved to be a pain to remove. Since the new floor was going to be tile, I wanted a strong bong between the plywood subfloor and tile underlayment. Although I'm not 100% certain that leaving this paper film would have compromised the bond strength between the tile mortar and plywood, I wasn't willing to risk it.
The linoleum that was glued directly the subfloor left its paper backing as I pulled it up, which proved to be a pain to remove. Since the new floor was going to be tile, I wanted a strong bong between the plywood subfloor and tile underlayment. Although I'm not 100% certain that leaving this paper film would have compromised the bond strength between the tile mortar and plywood, I wasn't willing to risk it.
.
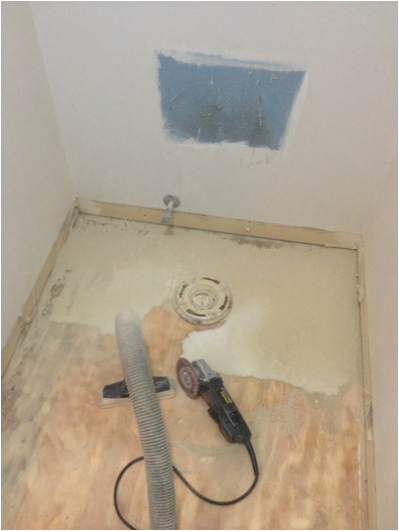
After trying every sanding tool I own, I found that my angle grinder with 36 grit sanding discs worked best. If this bathroom were any bigger I would have rented a floor sander.
.
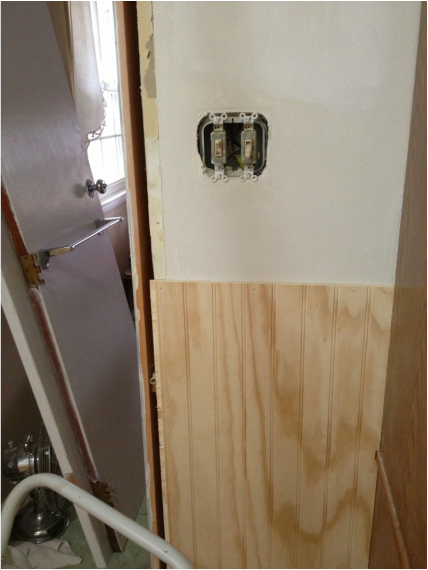
Next I installed beadboard wainscoting.
.
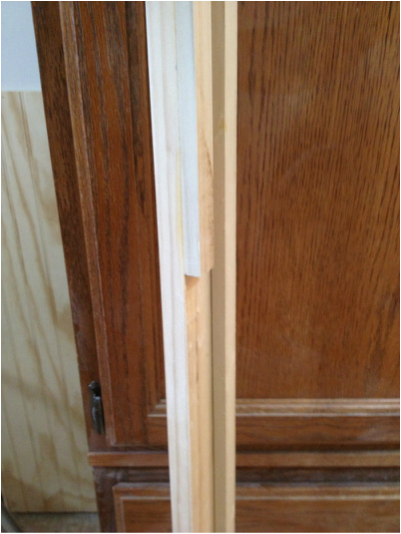
I added strips of poplar to the back of the door casing to account for the thickness of the beadboard (roughly 3/8"). If you don't do this the baseboard will stick out past the casing too far.
.
I then primed all the walls and trim.
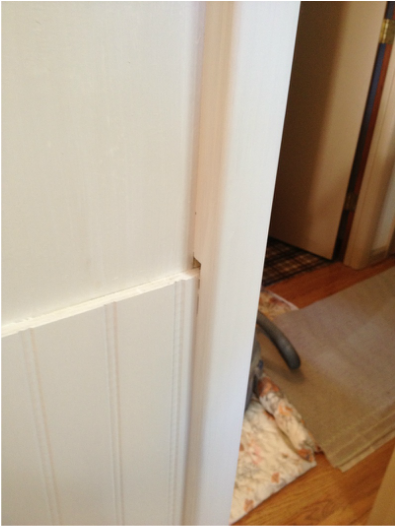
Here you can see how the casing transitions from the beadboard to the wall.
Here you can see how the casing transitions from the beadboard to the wall.
.
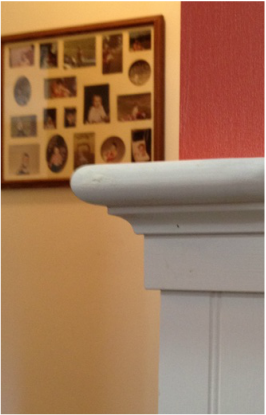
Next, I put two coats of paint on the walls and woodwork. After that I installed the three-piece beadboard cap shown here.
.
Moving on with the floor tile...
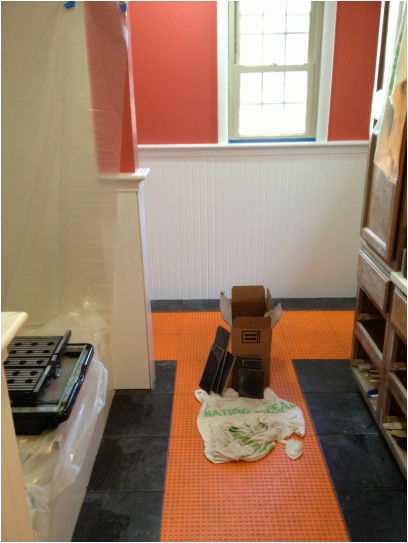
The orange underlayment is Ditra which supposedly allows the tile to move independently of the subfloor to prevent cracking. I've never actually tested it, but some tile pros I've talked to swear by it, while others stick to the traditional cement board underlayment. Using Ditra as an underlayment instead of cement board is undoubtedly much easier and faster.
The orange underlayment is Ditra which supposedly allows the tile to move independently of the subfloor to prevent cracking. I've never actually tested it, but some tile pros I've talked to swear by it, while others stick to the traditional cement board underlayment. Using Ditra as an underlayment instead of cement board is undoubtedly much easier and faster.
cabinets and countertop...
After the tile was done, my mom decided to paint the cabinets. She had hopes of leaving them brown but changed her mind after seeing them against the new tile and paint colors. She also decided to paint the mirror frame.
.
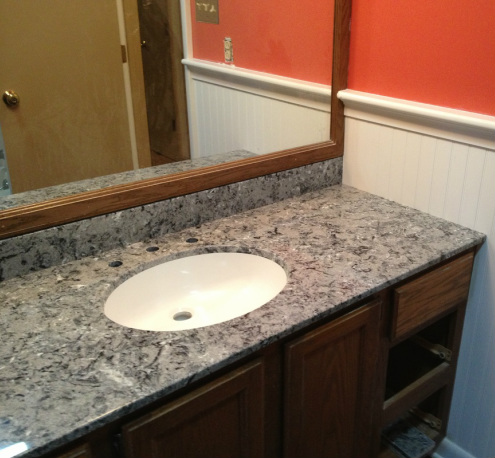
While my mom was deciding on a color for the cabinets, my cousin and I installed the counter top.
This is a cultured marble counter and sink that I ordered from US Marble- it took about six weeks to get it. I ordered the back and side splashes separately so I could trim them for an exact fit. A lot of cultured marble tops have the backsplash built in. Those are usually more difficult to work with in remodel situations.
Click here for tips on cutting cultured marble.
.
Cabinet painting...
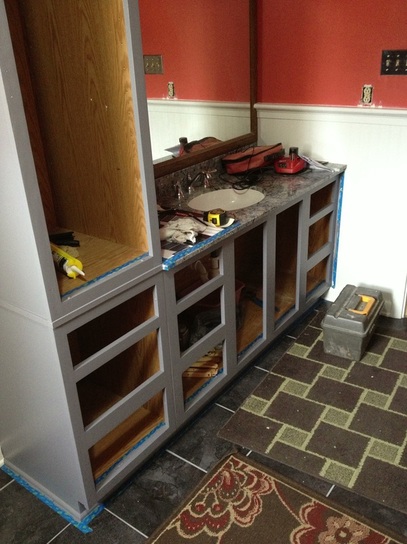
I sanded all the surfaces that were to be painted and applied two coats of a primer formulated for glossy surfaces.
I sanded all the surfaces that were to be painted and applied two coats of a primer formulated for glossy surfaces.
.
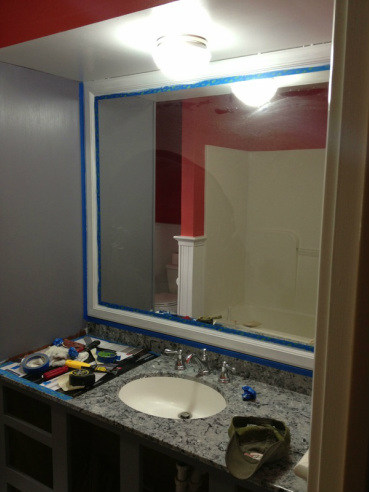
Mirror frame painting...
.

Extra drawers...
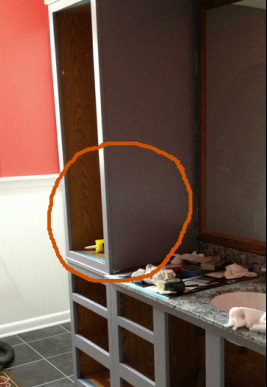
During the 1986 remodel, my granddad had to remove the circled drawer boxes to make room for the sinks; he then just clipped the drawer fronts back onto the face frame. Since there was now only one centered sink, these drawers could be used again.
The original drawer boxes weren't anywhere to be found so I made new ones.
.
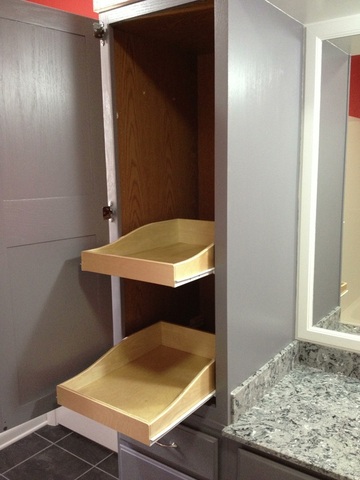
I also built two drawers for the lower half of the wall cabinet. Since this cabinet is as deep as the base cabinets, lesser-used items tended to get shoved in deeper and forgotten about. Exhuming something from the back often resulted in a toiletry avalanche.
.
Drawer box construction...
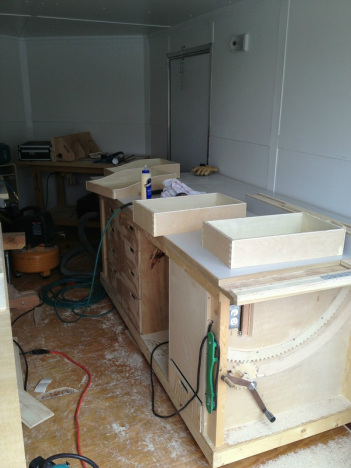
Even though my work trailer is far from complete, having it on site was a dream. I was able to build these four drawer boxes in under three hours.
I spent an additional four hours sanding and finishing- a
regularly underestimated and downplayed part of woodworking.
*I value quality more than quantity, which often results in less visual accomplishment over time. With a good tool set-up, however, speed substantially increases without compromising workmanship.*
.
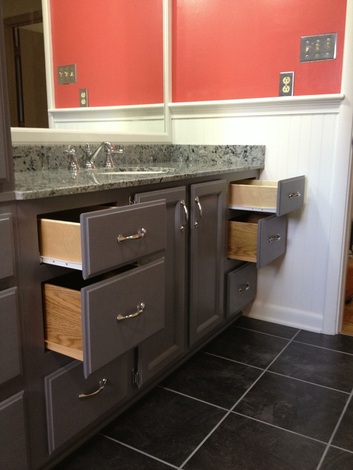
The new drawers installed...
The drawer boxes I built are made out of birch plywood, which is why they are lighter in color. The older boxes are made out of particle board with a vinyl covering that looks like oak; I didn't have access to that type of material to make matching boxes.
Particle board products are often frowned upon by purist cabinet makers, and usually for good reason, but these have held up really well.
.
Wall cabinet drawers...
finishing touches...
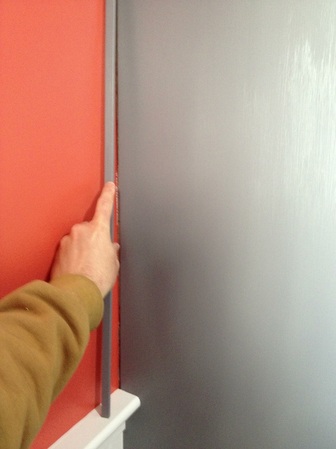
There was a 3/16" space between the wall and upper cabinet, a little too big for caulk, so a made a small trim piece to bridge the gap.
.
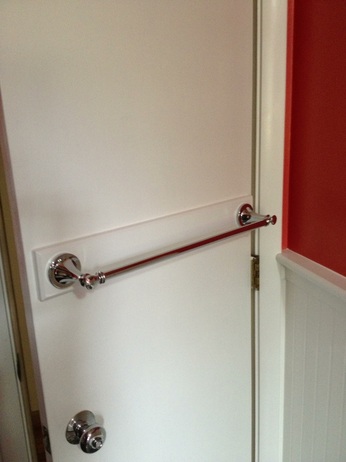
My mom wanted a towel bar on the door adjacent to the sink so I glued a 5/8" think piece of wood to it for solid anchoring- a must for hollow core doors.
.
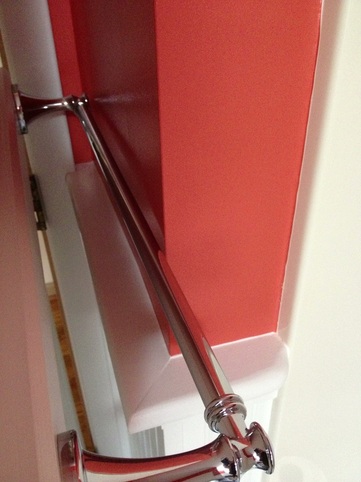
Unfortunately I couldn't find a door stop long enough to keep the towel bar from hitting the wall...
.
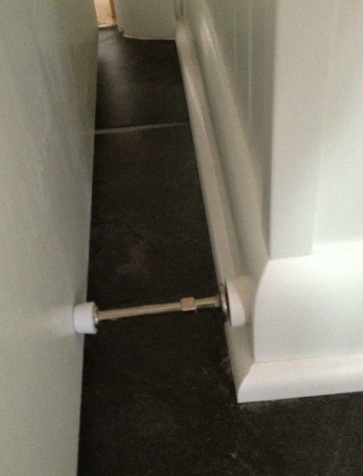
...so I glued a piece of dowel to the baseboard to give the door stop more reach.
I could have used a hinge stop, but that would not have provided the abrupt, deadening stoppage I wanted for this situation. I also could have used a stop that attaches directly to the floor, but that would have required drilling through the tile- something I try to avoid if possible.
I could have used a hinge stop, but that would not have provided the abrupt, deadening stoppage I wanted for this situation. I also could have used a stop that attaches directly to the floor, but that would have required drilling through the tile- something I try to avoid if possible.
See the Before and After pictures
Help Acknowledgement:
I was fortunate enough to have my cousin's help with the wall painting, tile, trim, and counter top install on this project. Click here to see another project we did together.
I was fortunate enough to have my cousin's help with the wall painting, tile, trim, and counter top install on this project. Click here to see another project we did together.
